APPROACH & ADVICE
ANALYSIS & PROCESS ENGINEERING
Together with the user, we make an analysis of the application and the process data (medium, pressure, temperature, …) to assess the nature of wear and any corrosion factors. Based on this data, we propose the most appropriate technique and material for a preventive coating or repair. The composition and type of coating are chosen based on the applicability on the substrate, the functionality of the part, and resistance to corrosion and wear. Often, for older parts, a detailed drawing is no longer available. In this case, a drawing is made with the aid of a model, and the tolerances are determined in consultation with the user.
INCOMING INSPECTION
An incoming inspection is always performed on the parts that are provided − this holds for repair as well as for new parts delivered by third parties for treatment. As standard, a dimensional inspection is performed, including determination of the run-out. For critical parts, an extensive incoming inspection is performed, including a report, in consultation with the user. In addition to checking the dimensions and rotation, the material is also determined, the thickness of old coating layers is measured, and a dye penetrant test is performed.
OPERATIONS
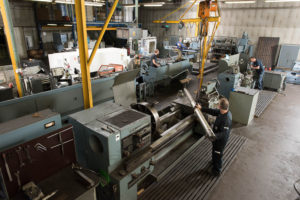
We have an extensive machine park, conventional and CNC-controlled, for lathing, milling, boring, and both external and internal grinding and polishing. Repairs of existing parts and larger pieces are carried out on conventional machines. New parts are made on CNC machines. Before spraying, the damaged part is lathed or ground to a clean surface. After coating, the coating is ground and polished according to specification with attention to tolerance, surface roughness and the desired roughness profile. A super-finish is also possible, with Ra values up to 0.005 μm.
For new parts: We make new machine parts for both the OEM industry and end-users. Regular orders are produced in series and delivered from call-off stock. If no drawing is available, parts are made to ‘model’. In this case, the model is fully measured and a technical drawing is made. The tolerances are determined in consultation with the user.
For repairs: The thermal metal spraying technique is extremely well-suited for repairing worn-out shafts, piston rods, wear bushes, rolls and cylinders, … This is a cold process, so no thermal deformation can occur. Also, no thermal post-treatment is required.
Overhaul: For critical components − such as piston rods or plungers for high pressure compressors − a specific overhaul procedure is performed. During an extensive incoming inspection, the wear image is determined and a surface defect examination is conducted. On the basis of this report, a proposal for overhaul is made, in which the intermediate steps are reported separately.
FINAL INSPECTION
Visual inspection: Parts are systematically subjected to a visual inspection. If a coating is applied, a visual inspection is conducted before and after the coating, and on the finished piece. If necessary, a dye penetrant test is performed and/or inspection under the microscope.
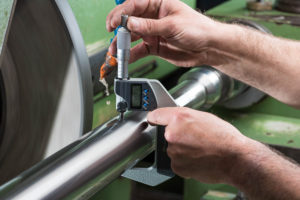
Dimensional inspection: The dimensions are systematically inspected and reported. In the case of repair, the dimensions of the repair are inspected; for new parts, there is a dimensional final inspection that reports the critical dimensions (with precise tolerance). In order to ensure consistent layer thickness, the dimensions for spraying are also carefully measured and recorded in an internal report.
Surface roughness: The surface roughness is carefully measured via Mitutoyo roughness gauges. This includes determining both the roughness values (Ra, Rt, Rz, …) and the roughness profile (BAC curve). In function of the application, a specific roughness profile can be desirable with an identical roughness value (Ra).
Material − PMI: We have an Oxford X-MET8000 Expert PMI meter with which the material can be determined in a non-destructive way. The composition of stainless steel and high-alloyed types of material can be measured with this instrument. Via a reference library, the currently used types of carbon steel can also be determined.
Dye penetrant test − LPT: A dye penetrant test can be performed in different phases of production or repair. For the coating of new parts, a dye penetrant test is carried out to check for possible surface defects. In the case of repairs, a dye penetrant test can determine whether the existing coating can be maintained. Furthermore, after removing an old coating layer, the base material can be examined for surface defects before applying a new coating. A dye penetrant test is also used as a final inspection on finished coating to detect any defects or micro-cracks.
DELIVERY & REPORTING
After the final inspection, the parts are carefully packed. Critical parts that are stored in stock for a long time can be packed wet or dry. In addition, if desired, a customized individual packaging is provided. The reports from the incoming, intermediate and final inspections are delivered with the goods. Upon request, they can also be made available electronically.
TRACEABILITY
AMW ensures full traceability of the delivered parts. The base material that we keep in stock is inspected upon receipt and receives its own unique lot number which links the material with the heat number. During treatment, this lot number is scanned and linked to the production order. All treatments and operators also have a unique code that is linked to the production order via scanning. In this way, the complete process is recorded in our system.


